


How to Make an Android App: A Step-by-Step Guide for Beginners
Are you eager to dive into the world of Android app development but don’t know where to start? You’re in the right place! This comprehensive guide will walk you through creating your first Android app from scratch. We’ll cover everything from setting up your development environment to adding interactive elements to your app. By the end, you’ll have a solid foundation to build upon and the confidence to tackle more complex projects.
The mobile app industry is booming, and Android holds a significant market share. Learning to develop Android apps can open up exciting career opportunities, especially in tech hubs like Toronto. In fact, many companies are actively hiring Android developers in Toronto to meet the growing demand for mobile applications.
So, let’s roll up our sleeves and get started on your journey to becoming an Android developer!
Setting Up Your Development Environment

Before we can start coding, we need to set up our development environment. This involves installing the necessary software and configuring it properly.
Installing Android Studio
Android Studio is the official Integrated Development Environment (IDE) for Android app development. It provides all the tools you need to build apps for Android devices. Here’s how to get it up and running:
- Visit the official Android Studio website.
- Download the latest version for your operating system (Windows, macOS, or Linux).
- Run the installer and follow the on-screen instructions.
- Once installed, launch Android Studio.
During the initial setup, Android Studio will download additional components. This might take a while, so grab a cup of coffee and relax!
Configuring the Android SDK

The Android Software Development Kit (SDK) contains the tools and libraries necessary for building Android apps. Android Studio usually installs the latest SDK automatically, but you might want to install additional versions:
- In Android Studio, go to Tools > SDK Manager.
- Select the Android versions you want to target.
- Click Apply and wait for the downloads to finish.
It’s a good idea to install the latest stable version and a couple of older ones to ensure your app works on a wide range of devices.
Creating an Android Virtual Device (AVD)
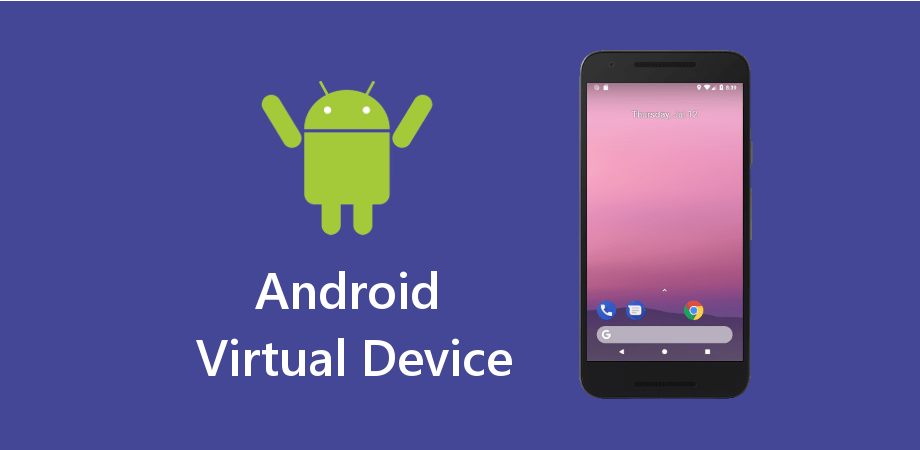
An Android Virtual Device (AVD) is an emulator that simulates an Android device on your computer. It’s incredibly useful for testing your app without a physical device. Here’s how to create one:
- In Android Studio, go to Tools > AVD Manager.
- Click “Create Virtual Device”.
- Choose a device definition (e.g., Pixel 4).
- Select a system image (the Android version).
- Configure any additional settings and click Finish.
You can create multiple AVDs to test your app on different screen sizes and Android versions.
Creating Your First Android Project
Now that our development environment is set up, let’s create our first Android project!
Starting a New Project
- In Android Studio, click “Start a new Android Studio project”.
- Choose “Empty Activity” as your project template.
- Give your project a name.
- Select the minimum SDK version (API level) your app will support.
- Click Finish.
Android Studio will generate the necessary files and folders for your project.
Understanding the Project Structure
Let’s take a quick look at the key components of your Android project:
- app/manifests/AndroidManifest.xml: This file describes essential information about your app to the Android system.
- app/java: Contains your Java source code files.
- app/res: Holds resources like layouts, strings, and images.
- Gradle Scripts: These files manage the build process and dependencies.
Designing Your App’s User Interface
A great app needs an intuitive and appealing user interface. Let’s design a simple UI for our app.
Introduction to XML Layouts
Android uses XML to define layouts. The main layout file for your app is activity_main.xml. You can edit it in two ways:
- Design view: Drag and drop UI elements.
- Text view: Edit the XML directly.
Understanding Layout Attributes
Let’s break down some common layout attributes:
- Layout width and layout height: Define the size of the view.
- text: Sets the text displayed on the view.
- id: Gives the view a unique identifier.
- padding: Adds space around the content of the view.
Experiment with these attributes to customize your layout further!
Running Your App
It’s time to see your app in action!

Using the Android Emulator
- Click the “Run” button in Android Studio (green play icon).
- Select the AVD you created earlier.
- Wait for the emulator to start and your app to launch.
Testing on a Physical Device
To run your app on a real Android device:
- Enable Developer Options on your device (usually by tapping the build number in Settings 7 times).
- Enable USB Debugging in Developer Options.
- Connect your device to your computer via USB.
- Select your device when you click “Run” in Android Studio.
Conclusion
Congratulations! You’ve just created and run your first Android app. This is just the beginning of your Android development journey. As you continue to learn and grow, you might find yourself ready to take on more complex projects or even looking for opportunities in the field.
At Designveloper, we believe that building an Android app is an exciting journey that combines creativity and technical expertise. By following a structured approach—from planning and UI design to coding, testing, and deployment—you can bring your app idea to life and make it available to millions of users worldwide. While the process may seem challenging at first, the right tools, frameworks, and resources can simplify development and ensure a smooth experience. Whether you’re a beginner or looking to enhance your skills, continuous learning and hands-on practice are key to mastering Android app development. Happy coding!
Also published on

Share post on


Related Articles
15 Best AI No-Code App Builders In 2026 (No Coding Skills Required)
15 Best AI No-Code App Builders In 2026 (No Coding Skills Required) Published July 06, 2026
Best Small Business Applications For Owners And Freelancers In 2026
Best Small Business Applications For Owners And Freelancers In 2026 Published June 30, 2026
What Is Native App Development? Pros, Cons, and Uses
What Is Native App Development? Pros, Cons, and Uses Published June 29, 2026